DIY Pressure Washing Driveway Damage: What UK Homeowners Miss
A jet-washed driveway can look brand new on Saturday and start falling apart by spring. Here's what pressure washing really does to block paving, Indian sandstone and sealant, and how to avoid it.
By The Editorial Team at The Exterior Experts
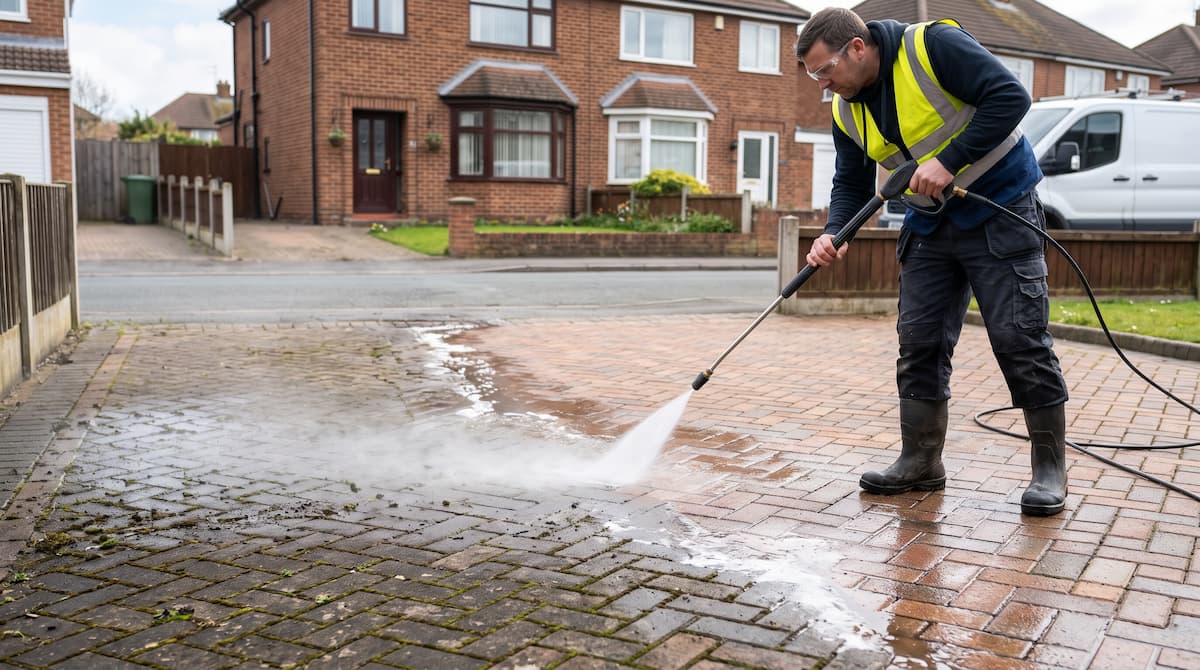
It starts on a sunny Saturday. A new pressure washer comes out of the box, a couple of Youtube videos get watched, and by lunchtime the driveway looks like the day it was laid. Immaculate! The grime peels away in satisfying stripes. The colour comes back. It feels like money well spent.
Then, a few months later, something feels off. A block wobbles underfoot. Sand appears in little piles by the drain. Black spots creep back onto the patio.
Here's the uncomfortable truth: the driveway that looks cleanest on Saturday afternoon is often the one in the most trouble. There's a reason it can look perfect for weeks before it starts to fail, and it has nothing to do with dirt. More on that shortly.
Also in this article: One tell-tale sign on a sandstone patio that shows a clean hasn't worked, even when it looks spotless. Also, the question you must ask yourself before a lance gets anywhere near your paving. We'll save that for the end.
Quick answer: Yes, DIY pressure washing can damage a driveway. A jet held too close blasts the jointing sand out of block paving so the blocks loosen and sink, scours the surface of porous Indian sandstone, and strips sealant unevenly. The pressure washer isn't the problem: uncontrolled washing without the right method and aftercare is.
Why Pressure Washing Feels Like the Easy Answer
It's easy to see the appeal. Jet washers are cheap to buy or hire, tutorials make it look simple, and paying someone to clean a driveway can feel like an indulgence when you could do it yourself in a morning.
And the immediate result is genuinely impressive. Years of green and black staining disappear in minutes.
The trouble is what you can't see. A pressure washer removes dirt, but it can also remove the things holding your driveway together. Professional cleaning is controlled: the right nozzle, the right distance, the right pressure for the surface, and a plan for what happens afterwards. DIY jet washing is usually just blasting, with the lance held close and pointed straight down, often straight into the gaps between blocks.
That last habit is where most of the damage begins. So what exactly is in those gaps?
Block Paving: The Sand Is the Structure
Block paving isn't glued or cemented together. Each block sits on a bedding layer, and the narrow joints between them are filled with kiln-dried jointing sand. That sand is what locks the blocks against each other so the whole surface acts as one interlocking piece rather than hundreds of loose bricks.
This is the reason a freshly jet-washed driveway can look perfect for weeks before it fails. The blocks are still sitting where they were. Nothing looks wrong. But the sand that held them in place has been washed down the drain, and the driveway is now relying on luck until the first heavy rain, the first frost or the first time a car turns sharply on it.
What Happens When the Sand Goes
When a narrow jet is held too close, or the same patch is blasted repeatedly, a chain reaction starts:
- Jointing Sand Washes Out: Open gaps are left between the blocks.
- Blocks Start to Move: They rock, spread or sink, especially where cars turn or park.
- Water Gets Underneath: Rain soaks into the joints and the bedding layer, softening it.
- Growth Moves In: Open joints full of damp debris are ideal for weeds, moss and algae.
- The Surface Becomes Uneven: Dips, drainage problems and pooling can follow.
Moss and weeds in the wrong place are rarely just cosmetic. The same is true higher up the house.
Read Our Analysis: Why Grass in Your Gutters Signals a Structural Risk →
Re-Sanding Isn't Optional
This is the step most DIY cleans skip entirely. Re-sanding after a deep clean isn't a finishing touch, it's essential, because pressure washing displaces joint sand by its very nature.
Done properly, it looks like this:
- Let It Dry: The paving must dry out completely. Damp sand won't flow into the joints.
- Brush It In: Kiln-dried sand is swept across the surface and into every joint.
- Compact It: Where appropriate, the surface is compacted so the sand settles deep into the gaps.
- Top Up and Tidy: Joints that have dropped are refilled, then the excess is swept away.
A proper block paving clean should include an inspection, controlled cleaning, re-sanding and aftercare advice. If it's just a jet wash, it's only half a job.
Already Jet Washed and Now It's Loose or Sandy?
If your driveway has already been pressure washed and you're seeing rocking blocks, empty joints or sand in the drains, it may need restoration rather than another clean. Tell us about your driveway and a local specialist will get back to you if we have one that covers your area.
Indian Sandstone: Why "Blast It Clean" Can Ruin It
If block paving is vulnerable, Indian sandstone is more so. It's a natural, porous stone with a layered structure, and it doesn't respond to brute force the way concrete does.
The Damage Aggressive Washing Causes
Turn a high-pressure jet on sandstone and you risk:
- Surface Scouring: The stone's natural riven texture is stripped away.
- Faded or Patchy Colour: Some areas end up worn more than others.
- Etching or Delamination: In severe cases, thin layers of the stone start to lift.
- Increased Porosity: Future staining and growth get worse, not better.
That last point is the cruel twist. A surface that has been roughened by over-washing holds more moisture and gives moss, algae and lichen more to grip. Clean it hard, and it gets dirty faster.
The Black Spot Problem
Now for that tell-tale sign we promised. If black spots return to your patio within weeks of a clean, the clean didn't work, however good it looked.
Those spots are usually black lichen, and lichen anchors itself into the stone. A pressure washer can remove the visible staining on top while leaving the living structure underneath untouched. It looks spotless, then the spots quietly grow back from where they never really left.
The Professional Alternative: Soft Washing
This is why specialists use soft washing on sandstone: a low-pressure application of a suitable stone-safe biocide that kills the growth, followed by a controlled rinse where appropriate. The treatment does the work, not the force of the water.
Two other cautions apply. Acidic cleaners can react badly with natural stone, and sealing isn't automatically right for every sandstone surface. Any sealing decision should only be made once the stone is completely clean and dry. In short, Indian sandstone needs a stone-specific method, not the same treatment as a concrete path.
The Sealant Problem: Stripped, Trapped or Never Replaced
Many driveways and patios were sealed when they were laid or after a previous clean. A DIY jet wash rarely strips that sealant evenly. It takes it off in patches.
The result is:
- Patchy Protection: Some areas stay sealed while others are left bare.
- More Water Absorption: The stripped areas soak up rain.
- Faster Growth: Moss, algae and lichen take hold sooner.
- More Frequent Cleaning: Which starts the whole cycle again.
The opposite mistake is just as common: sealing too soon. Block paving needs to be completely dry before sealing, or moisture and dirt get trapped underneath, which can leave a cloudy, shiny or peeling finish. Sandstone needs careful product choice and preparation.
Good sealing is a diagnostic job. Someone should assess the surface condition, moisture, joint stability, previous treatments and drainage before anything goes on. Before paying for another sealant, get the surface properly looked at.
The Cheap "Jet Wash Guy" Problem
The lowest quote can turn out to be the most expensive option. Not every cheap operator cuts corners, but the shortcuts are worth recognising:
- The Turbo Nozzle: Held far too close to the surface.
- No Pre-Treatment: Moss, algae and lichen are blasted rather than treated.
- No Re-Sanding: The joints are left empty.
- No Inspection: Joints aren't checked before or after.
- One Method for Everything: No distinction between sandstone and block paving.
- Rushed Sealing: Sealant applied to damp or dirty paving.
- Surface-Only Lichen Removal: Black spots cleaned on top and left to regrow.
It's the same pattern we've seen with windows, where a bargain price often hides what's missing from the job. Our article on what British homeowners risk when they hire off a flyer covers the same trap in a different trade.
What your driveway needs isn't simply someone with a pressure washer. It needs someone who understands surfaces, drainage and long-term maintenance.
Warning Signs Your Driveway Has Already Been Damaged
If any of these sound familiar, your driveway may already be paying the price for a past clean:
- Loose Sand: Sand collecting on the surface or washing into drains after rain.
- Rocking Blocks: Blocks that move underfoot or sound hollow.
- Quick Regrowth: Widening joints, or weeds and moss coming back fast.
- Dips and Sinking: Uneven areas, often where cars turn.
- Pooling Water: Rain sitting on the surface instead of draining away.
- Tired Sandstone: Stone that looks faded, rough or patchy.
- Returning Black Spots: Lichen back within weeks of cleaning.
- Failing Sealant: A shiny, patchy or peeling finish.
None of these mean the driveway is ruined. They do mean it probably needs restoration, re-sanding, biocide treatment or a proper assessment, not another aggressive wash.
What a Professional Restoration Should Include
Use this as a checklist when you speak to anyone about your driveway or patio:
- Surface and Drainage Assessment: Identifying the paving type, existing damage, joint condition and how water flows off the surface.
- The Right Cleaning Method: A rotary surface cleaner for suitable block paving, and low-pressure or soft-wash methods for vulnerable sandstone.
- Pre-Treatment: A surface-appropriate biocide for moss, algae and lichen.
- Controlled Rinsing: A wide fan, a sensible distance from the surface and no direct blasting into joints.
- Re-Sanding Block Paving: Only once it's fully dry, using kiln-dried jointing sand.
- Optional Sealing: Only where appropriate, on a fully dry and properly prepared surface.
- An Aftercare Plan: Realistic cleaning intervals, drainage advice and the warning signs to watch for.
On The Exterior Experts, cleaners on our Silver and Gold tiers have had their ID and insurance documents checked, which is a sensible starting point when you're letting someone work on your property.
DIY Versus Professional: The Real Cost
The true cost of a clean isn't what you pay on the day. It's what the surface costs you over the next few years.
| Factor | DIY or Cheap Jet Wash | Professional Clean |
|---|---|---|
| Immediate Result | Often looks clean. | Clean without unnecessary surface damage. |
| Jointing Sand | Often removed and not replaced. | Replaced once the surface is dry. |
| Sandstone Risk | High if the pressure or nozzle is wrong. | Stone-specific, low-pressure method. |
| Lichen | Often returns quickly. | Biocide-led treatment. |
| Sealant | May be stripped or badly applied. | Assessed and applied only if suitable. |
| Long-Term Cost | Repairs, sinking and repeat cleans. | Lower risk of avoidable damage. |
Professional block paving cleaning with re-sanding is usually priced by the size of the area, so the best way to know what your driveway will cost is to describe it and request one of our exterior cleaners to contact you.
Frequently Asked Questions
Can Pressure Washing Damage Block Paving?
Yes. High pressure aimed into the joints washes out the jointing sand that locks the blocks together, which can leave them loose, uneven or sinking. Controlled cleaning followed by re-sanding avoids this.
Why Does Sand Come Out After Jet Washing?
Because the jet physically blasts it out of the joints. That's normal with any deep clean, which is why the driveway should always be re-sanded with kiln-dried sand once it's fully dry.
Can You Pressure Wash Indian Sandstone?
It's risky. Sandstone is porous and layered, so high pressure can scour, fade or even delaminate it. A low-pressure soft wash with a stone-safe biocide is the safer approach.
Why Do Black Spots Come Back After Cleaning?
They're usually black lichen, which anchors into the stone. Pressure washing can remove the visible stain while leaving the growth behind, so it returns. A biocide treatment tackles the root of the problem.
Should Block Paving Be Sealed After Cleaning?
Not always, and never straight away. The paving must be completely dry and properly re-sanded first, and the surface should be assessed to decide whether sealing is worth doing at all.
The One Question to Ask Before Anyone Touches Your Driveway
So here's the question we promised at the start. Before you, or anyone you hire, picks up a pressure washer, ask: "What surface is this, and what happens after the wash?"
It sounds simple, but the answer tells you almost everything. Someone who knows the difference between block paving and sandstone, who talks about re-sanding, biocide and drying time before sealing, is treating your driveway as a structure. Someone who just says they'll "blast it clean" is treating it as dirt.
The pressure washer was never the villain. Uncontrolled pressure washing without surface-specific knowledge and aftercare is. Ask the question, and the three big risks (blown-out jointing sand, damaged sandstone and stripped or unsuitable sealant) mostly take care of themselves.
If your driveway or patio needs a proper clean, or a past jet wash has left it loose, sandy or spotty, request a free quote through The Exterior Experts. It's free for homeowners, there are no cold calls and no upfront payment, and a local cleaner will get back to you. The earlier a problem is spotted, the less likely it is to become a costly repair.
Before you book, know what to ask
Get our free Homeowner's Window & Gutter Cleaner Checklist.
Download the Free Checklist